Applying for an American Tourist Visa
A few months ago, I was granted a U.S. tourist visa from the embassy here in South Korea, so I wanted to share the process with you to help you in making sure you do everything you can in order to have a successful experience. Of course, nothing is guaranteed, and at the end of the day the decision is made by the relevant authorities, but hopefully this blog gives you a good guide to the process, so that you can be fully prepared.
01. DS-160 Form
The first step in your U.S. visa application process is to fill in the DS-160 form online at the US Department of State’s Nonimmigration Visa Application (DS-160) page. This is the initial screening process for obtaining a visa and so it is important that you complete it accurately and thoroughly. While I highly advise taking all documents recommended in this post with you to the embassy for your visa interview stage, sometimes the officer does not even ask you for any of these. This demonstrates the importance of the DS-160, as this alone might suffice to grant you the visa or not.
The online form is pretty self explanatory – just read carefully and slowly.
NOTE 1: The DS-160 is a lengthy form but you can save and come back to your DS-160 form at any time.
NOTE 2: You will have 30 days to complete a partially saved DS-160 application. The 30 days are calculated from the most recent edit of your application. Your application will be deleted and you will have to start from the beginning if you do not complete and submit your DS-160 form within 30 days.
NOTE 3: For ‘TEMP. BUSINESS PLEASURE VISITOR (B)’, there will be 3 options to choose from -B1 (Business), B2 (Tourism), B1/B2 (Business and Tourism). I suggest selecting “B1/B2” even though your purpose is strictly business or tourism. A U.S. visa is issued for 10 years and it will spare you from unnecessary questions at the port of entry if you need to enter for a different reason after the first trip.
NOTE 4: After starting the DS-160 application, make sure to write down or save the automatically generated Application ID. You will need this to retrieve your application later
I strongly advise having the following documents ready (or having the information saved in an excel file) before you start completing the DS-160 form.
- Passport
- A digital version of a picture that meets the U.S. standard guidelines for a photo.
- Address details of your main stay in the U.S. (friend/family’s address, hotel, etc.).
- Flight details (if these are available).
- Previous U.S. travel information, if applicable (visa number, entrance and exit dates, etc.)
- If applicable, be ready to provide details (full name, address, contact number, email address) of the person or organization you will be visiting in the U.S.
- Your mother and father’s details (surname, given names and date of birth), as well as your spousal details if applicable.
- Your current employer details (full address, phone number).
- If applicable, you need to know the start date of your current job, school curriculum or business + a brief list of duties performed at your current job or business.
- Details (address, contact numbers, name and surname) of all previous employers. 5 years back will be sufficient.
- Details of educational institutes (address, date of attendance from and to)
NOTE 5: Having an updated CV available for reference on details is really helpful when completing the form.
- Details of all countries you have traveled to in the last 5 years (Just a list of the countries will suffice). Make sure to include your country of residence.
NOTE 6: For an even more detailed explanation of how to complete the DS-160 form refer to this site.
02. PAY THE MRV visa fee
After you complete and submit the DS-160, your next step is to pay the visa fee and schedule an interview.
Once you have received a confirmation email, follow the instructions to pay the visa fee.
TIP: Make sure you save the unique account number you use to pay the fee.
03. New User Registration & Scheduling an Interview
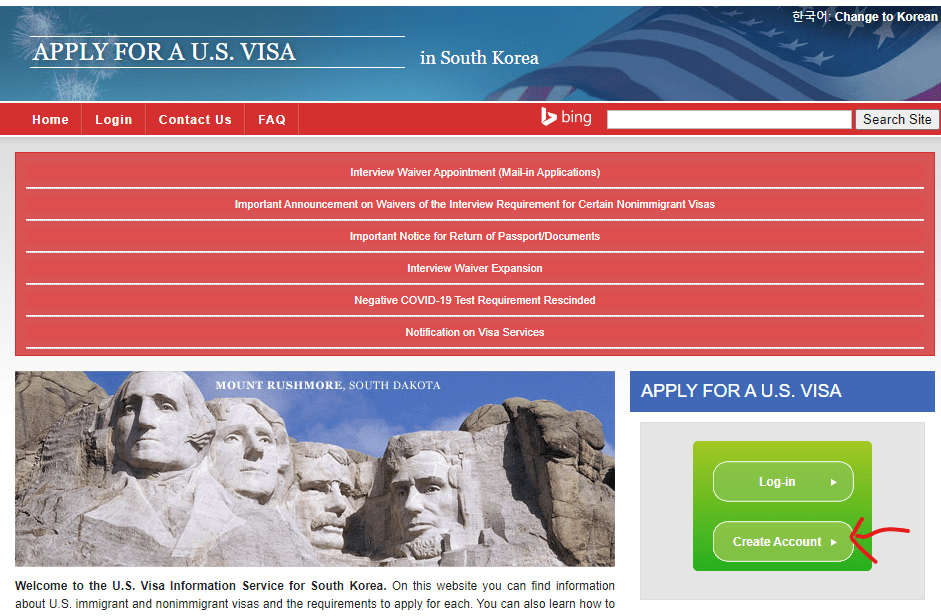
Register your profile at the US Travel Docs website.
- Select the country where you would like to schedule your appointment.
- Select ‘No’ to the question “Is this your first time applying for a visa and/or visiting our site?”
- Click on “Create Account” button under “APPLY FOR A U.S. Visa”
4. You will be taken to “New User Registration” section.
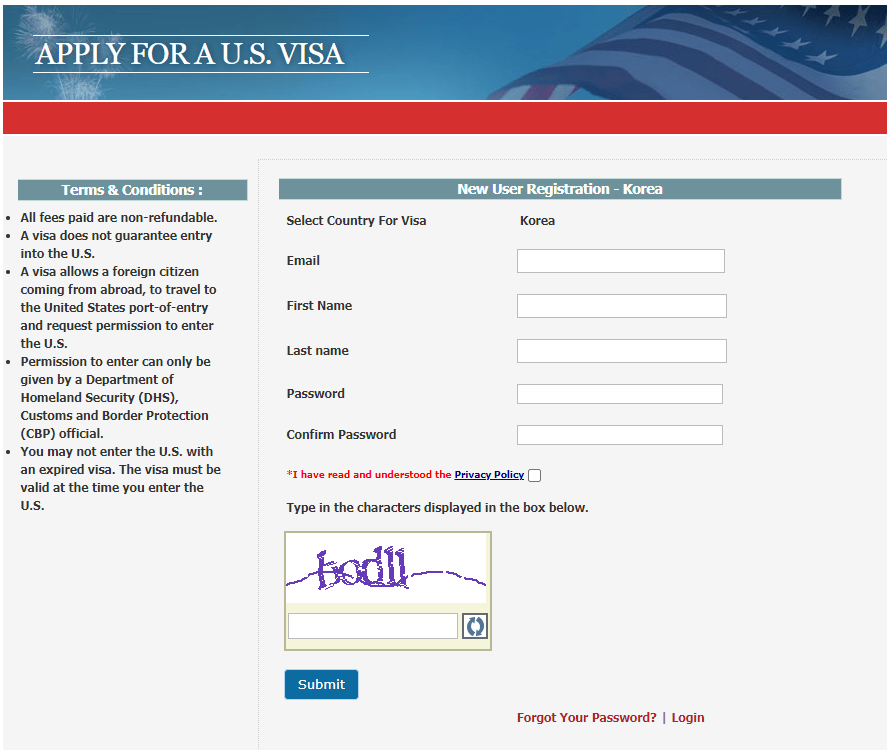
5. Click on the “Submit” button to register a new profile. Make a note of your username (your email) and password. You will need these credentials to save and come back to your application later.
NOTE: The next steps in the process of scheduling an interview are pretty self-explanatory through the site. If, however, you do need more details help with the process, refer to the site here.
4. Interview
It’s not over yet! A lot of people are most scared of the actual interview at the embassy, but trust me, it is not as bad as you think. I have made an extensive list below of documents that I gathered for my interview day. Please be aware that, at the time of posting, the only officially required documents for the interview are the following:
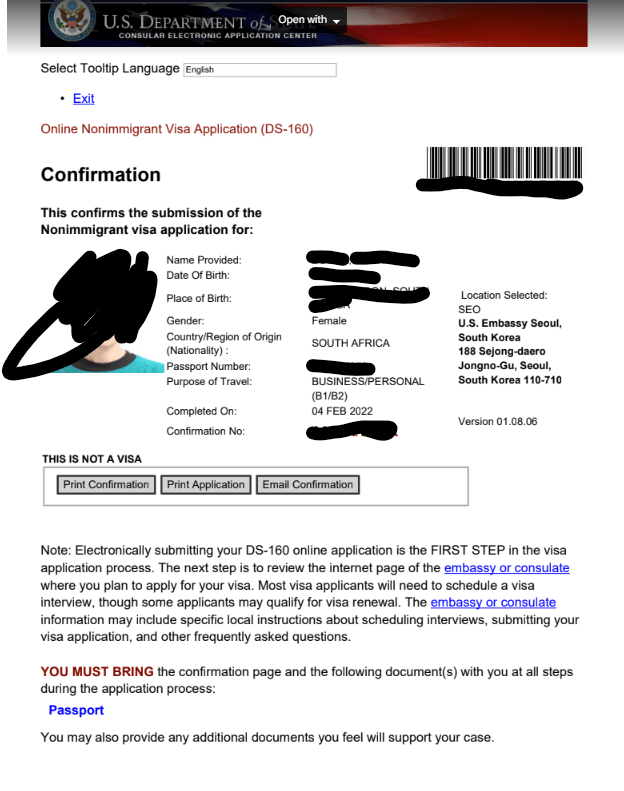
- The application confirmation page. Please do not print out your entire application (unless you want it for your own reference). On the day of interview, you only need the page that shows the application barcode clearly.
- Passport
- Proof of payment of visa fee
While these are the only official documents needed, it is strongly suggested that you bring any additional documents that you think will support your case. Ironically, I went with a giant wad of extra documents but was not asked for any of these (Better to be safe than sorry in my opinion). Here’s a list of the documents that I took with me but feel free to take anything you think might be helpful in granting a visa:
- Housing Lease
- Bank statements / funds / investments from home country + Korea). The home country investments provide proof that you have ties to your home country and aren’t planning on immigrating to the U.S.
- Letter of invitation from a friend / family member in the U.S. , if applicable.
- Contact Details of point of contact in America
- Rough travel itinerary that includes details such as contact numbers and address
- Travel companion details, if applicable (their passport number, full name and surname, address)
- Return flight/flight out of the U.S. if possible
- Work contract if available
- A letter from your current employer that states you will be returning to your job (if applicable)
NOTE: This information is relevant to the US embassy in South Korea. On the day of the interview, it is best you only show up at the embassy with your cellphone if needed and the relevant documents. Each person was only allowed one electronic device to enter with, which needs to be stored in the front before you are ushered to the interview room.
NOTE: This information is relevant to the US embassy in South Korea. On inspection at the main gates of the embassy, you will pass security and enter to hand in your cellphone/electronics. After that you will be taken to an interview room where you need to give the person at the entrance your application page and passport. You then go to a window where your details are checked again. After that, you stand in a line for your interview, which is just done at a window (no privacy, so be prepared to be asked questions while everyone can hear what is being said). In most cases your visa will either be denied or granted immediately, unless further documentation is required.


One Comment
lasixTes
I am not sure where you’re getting your info, but good topic. I needs to spend some time learning much more or understanding more.
Thanks for great info I was looking for this info for my mission.